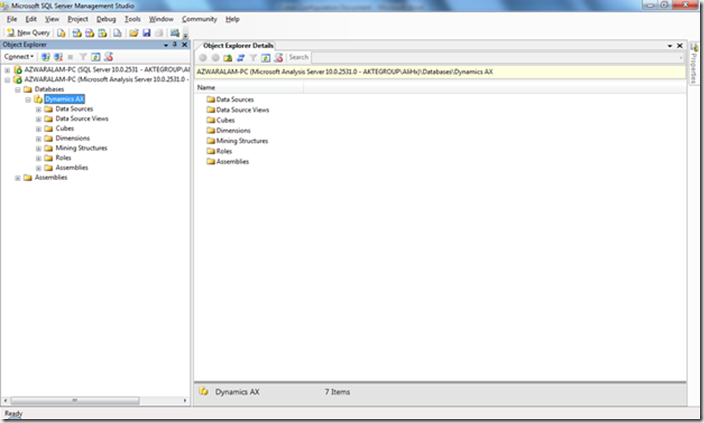
Step 1: Install analysis extension by executing Dynamics AX 2009 Setup. It will create a Dynamics AX database in Analysis Services.
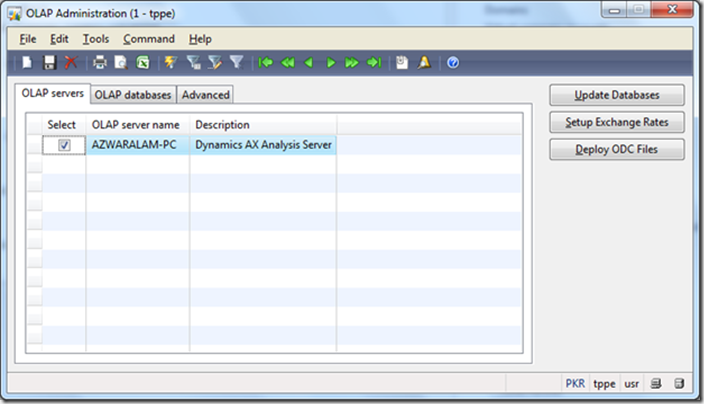
Step 2: Run Dynamics AX 2009 Client and go to > Business Analysis > OLAP > OLAP Administration.
Step 3: Set OLAP Server name the one where Analysis Extension create new Dynamics AX database.
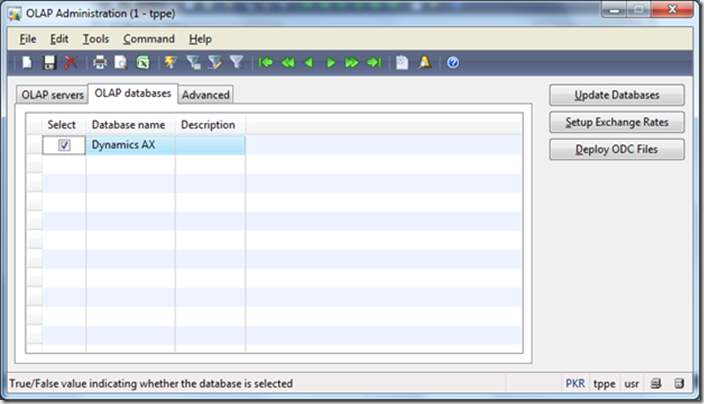
Step 4: Set OLAP database name.
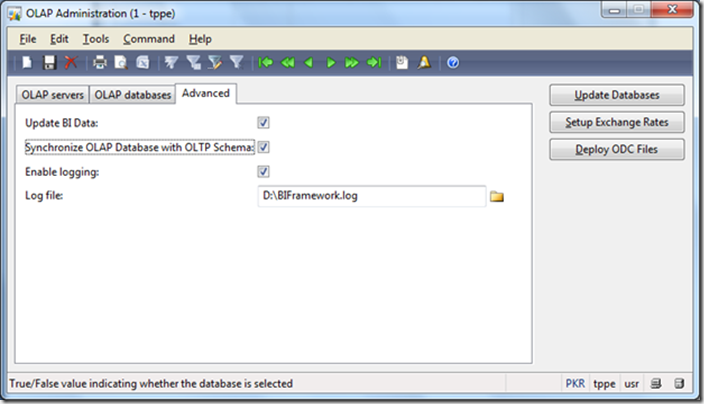
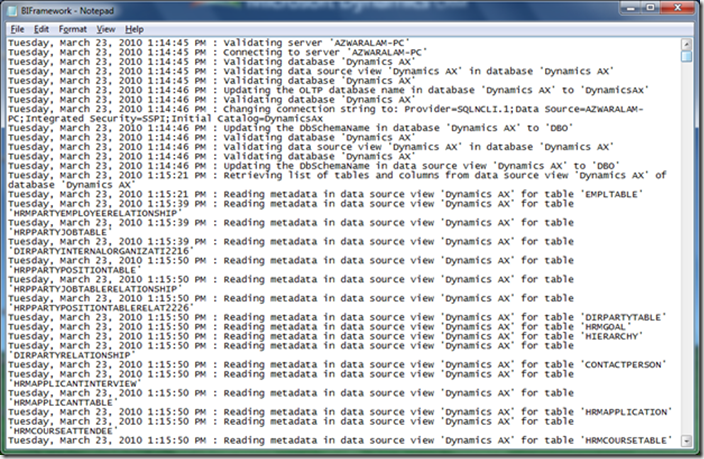
Step 5:- In Advanced Tab Check on Update BI Data, Synchronize OLAP Databases with OLTP Schema and Enable Logging. Set the Log file path and then click on update databases.
-It will take some time approximately 1 hour or more and then log will generate.
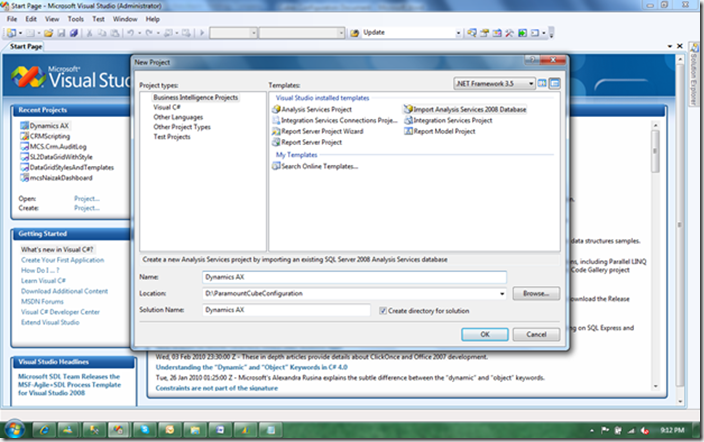
Step 6:- Start SQL Server Business Intelligence Development Studio. Create New Project with the Import Analysis Services 2008 Databases.
-Name the Project Dynamics AX.
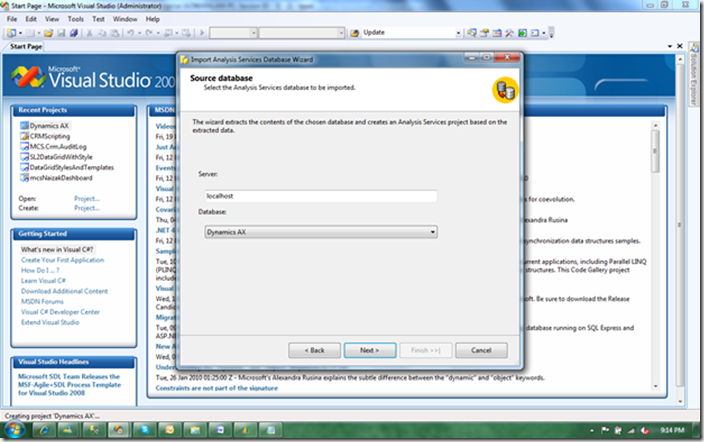
Step 7:- After clicking on Next write Analysis Server name in server and the select analysis services database.
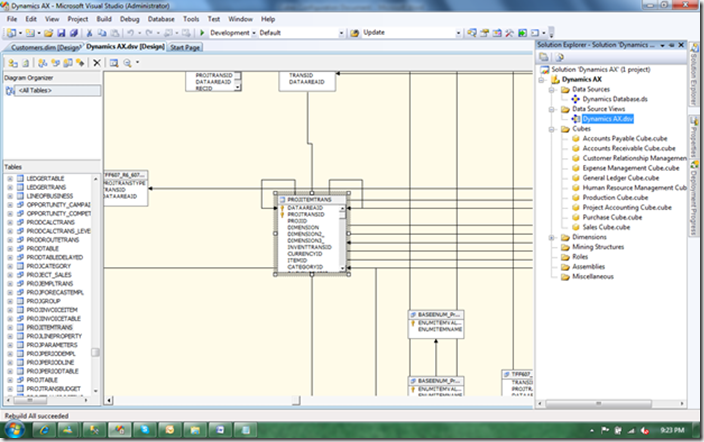
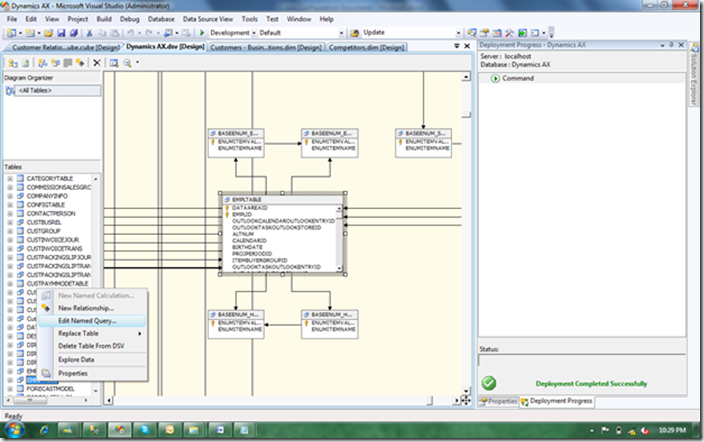
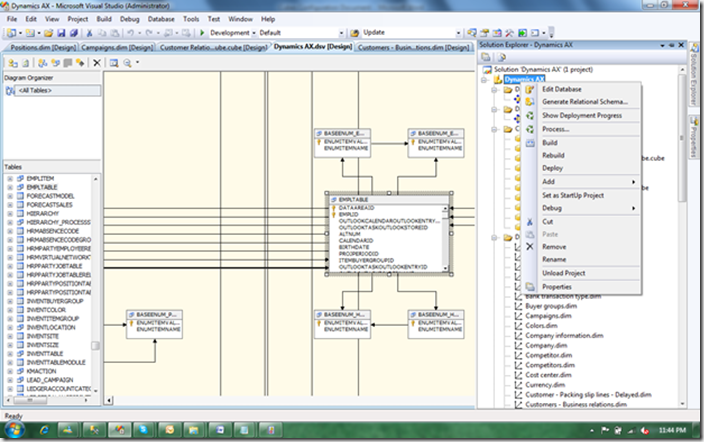
Step 8: After clicking on Finish Dynamics AX Analysis database will be import in SQL Server Business Intelligence Development Studio and then click on Dynamics AX.dsv in data source view.
-On left hand pane it will show you Tables and Views.
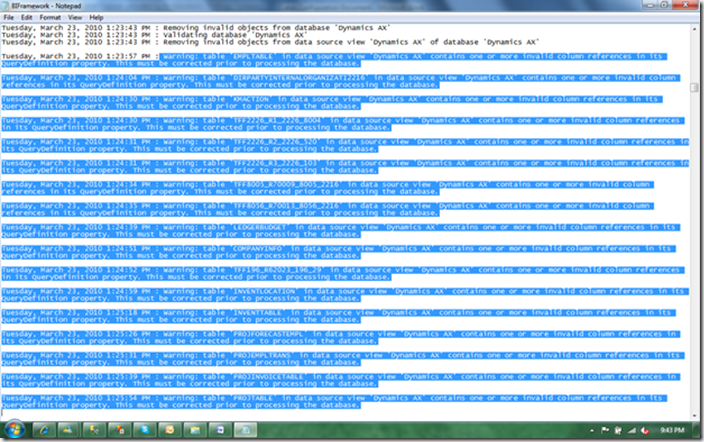
Step 9:- Now go to log file the one that we have generated earlier and search “Warning: table 'EMPLTABLE' in data source view 'Dynamics AX' contains one or more invalid column references in its Query Definition property. This must be corrected prior to processing the database”
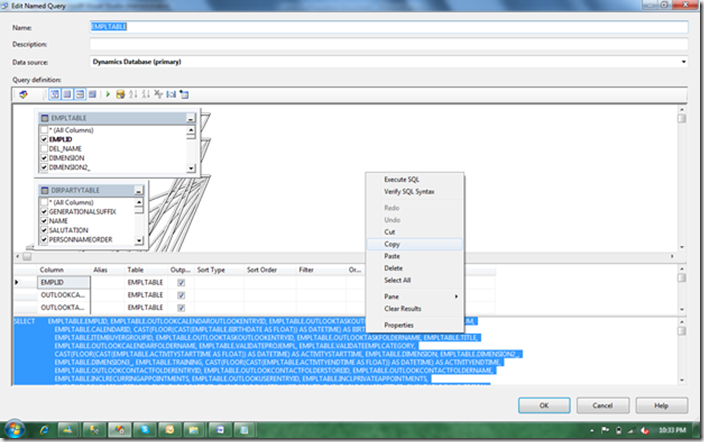
Step 10:- Note the warning table name for example EMPLTABLE and then go to SQL Server Business Intelligence Development Studio right click on EMPLTABLE and then Edit Named Query.
Step 11:- Copy query and then paste it in SQL Server.
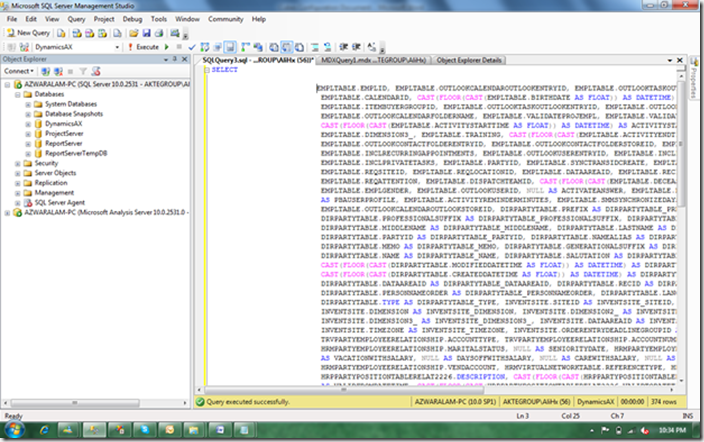
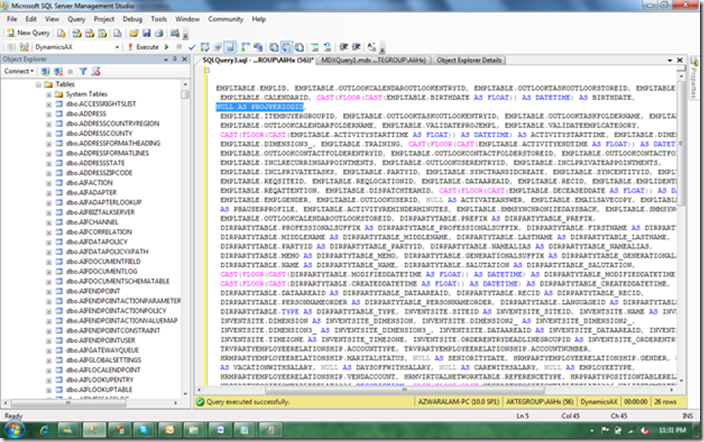
Step 12:- Paste query in SQL Server with primary Axapta database selected from which the Main application of Axapta is running.
Step 13:- Set invalid columns null in query.
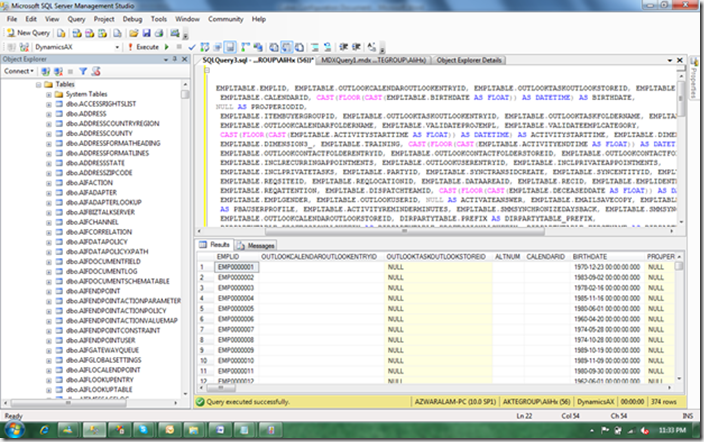
Step 14:- After setting null to all invalid columns execute query.
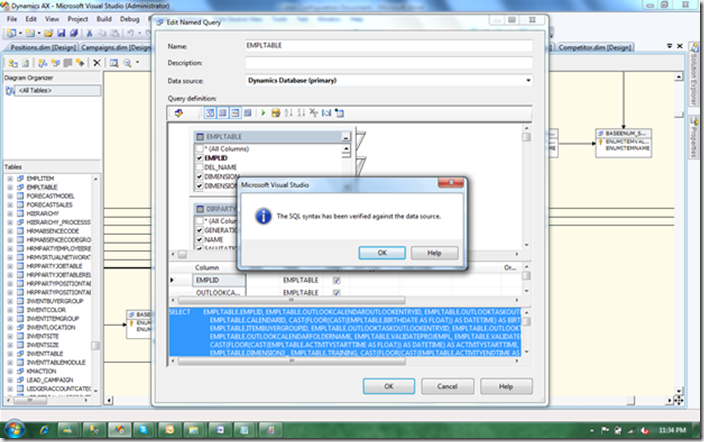
Step 15:- When query run successfully copy it and paste it into SQL Server Business Management Studio and verify SQL by clicking on SQL button and then press OK.
Step 16:- Repeat steps 9 to 15 for all warning tables in log file.
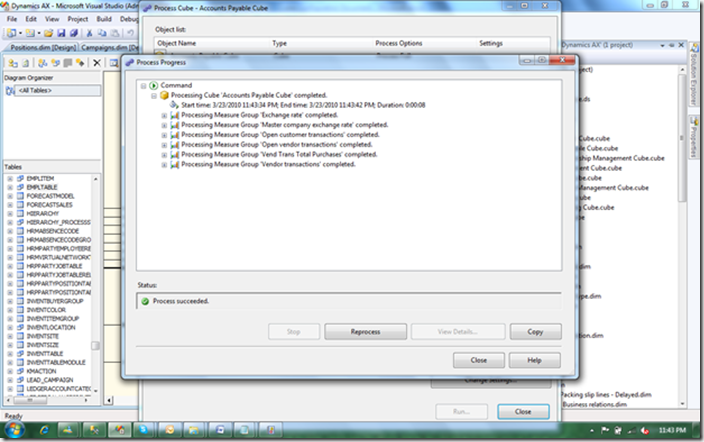
Step 17:- Process cubes one by one in SQL Server Business Intelligence Management Studio.
Step 18:- When all cubes process successfully then deploy the project by right click Dynamics AX database in project and click on deploy.
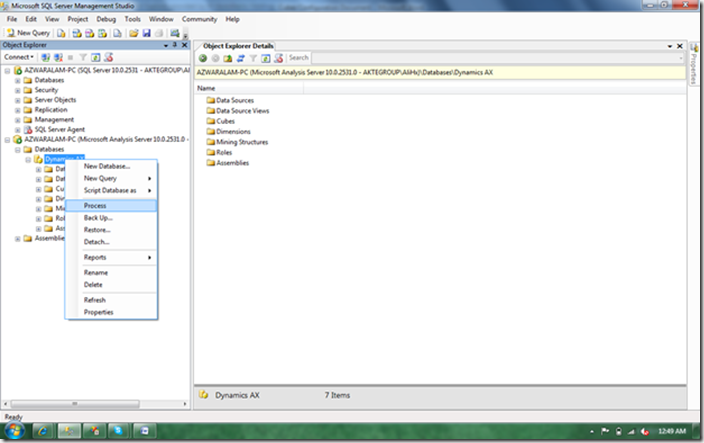
Step 19:- Right click on Dynamics AX database in Analysis server and then process.


1 comment:
I read a lot of stuff and i found that the way of writing to clearifing that exactly want to say was very good so i am impressed and ilike to come again in future.Microsoft Dynamics Consulting
Post a Comment